How to add a live chat to a Webflow website for free

So you’ve just set up your new Webflow website.
All that’s missing is a live chat so you can assist your visitors in real-time.
Well, you’ve come to the right place. Today, we will go over how to add a live chat to your Webflow website for free.
Choosing a live chat tool
The first step is to choose a live chat tool to use on your website.
While there are many options out there, we obviously recommend Moment, our fully featured live-chat tool with CRM integrations. Best of all, you can use these features in Moment for free.
The rest of this tutorial will go over how to add a live chat to your site with Moment.
Installing a live chat to a Webflow website in 3 simple Steps
Installing a live chat to your webflow website is simple and can be done in 3 steps!
- Create a new team on Moment
- Create a Free Moment Account and verify your email
- Installing the code snippet
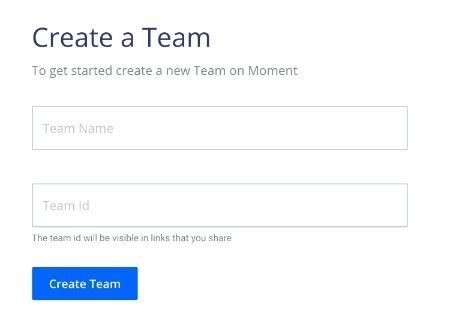
Step 1: Create a new team on Moment
To get started, you will just need to create a free Moment account to install a live chat.
Registering to Moment is free and doesn't require a method of payment!
To start you'll need to create a new team on Moment, We recommend using your company's name.
Step 2: Create a Free Moment Account and verify your email
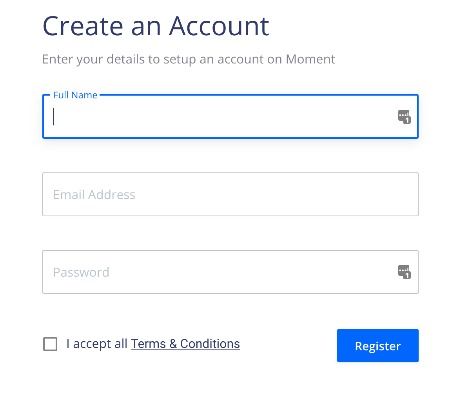
Once you've created your team, you'll need to register using an email. You'll get a confirmation to verify your email.
Step 3: Installing the Code Snippet
After setting up your team and verifying you email, you'll be taken to this page
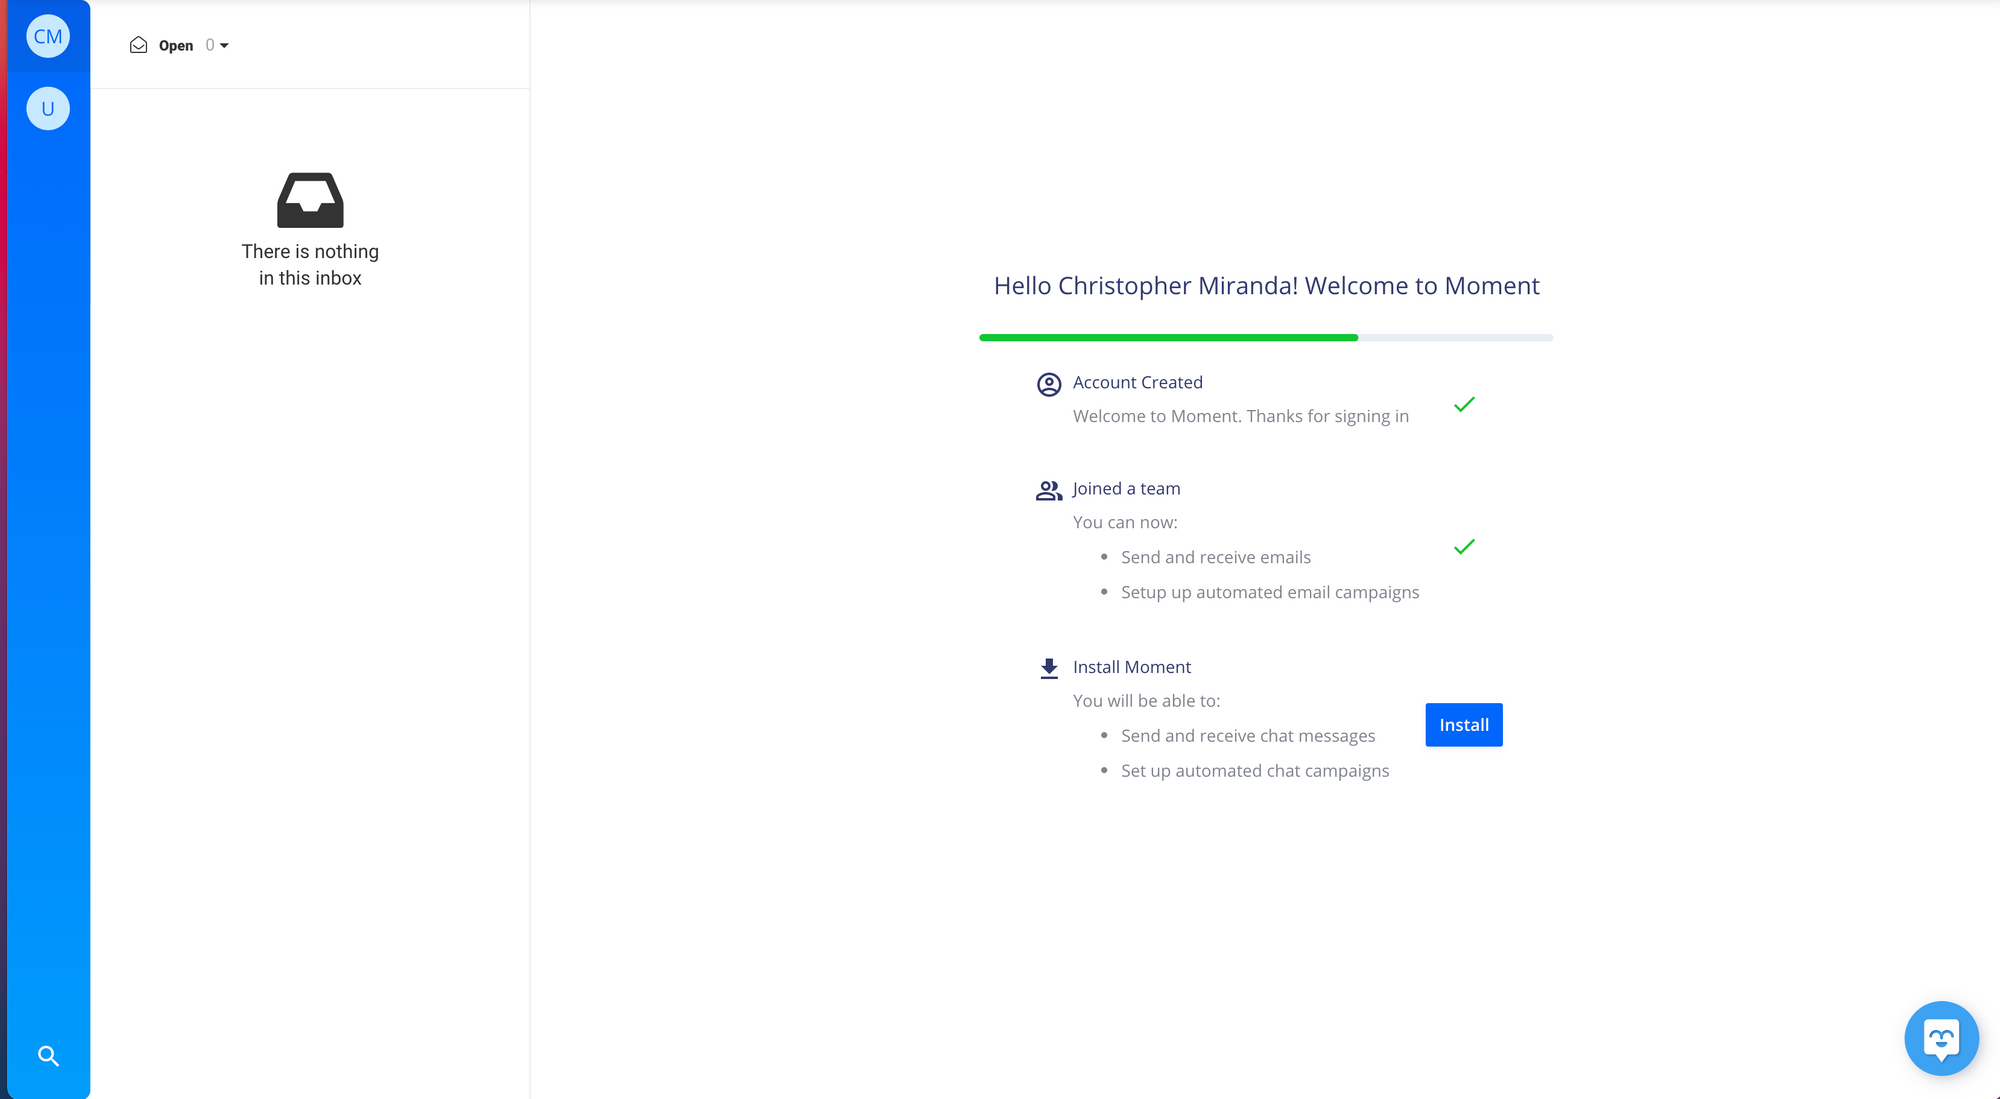
Click on the install button, Moment will provide you with a code snippet to install on your site. If you do not know how to do this, you can forward it to your webmaster. Simply copy and paste this code into your <head> tag
You will also be given the option to enable Moment Tracking. This feature records the sessions of your users on your site, allowing you to see the issues they have experienced while assisting them. This feature is fully optional.
After going through this process, you will be provided with a Moment code snippet to install on your Webflow website.
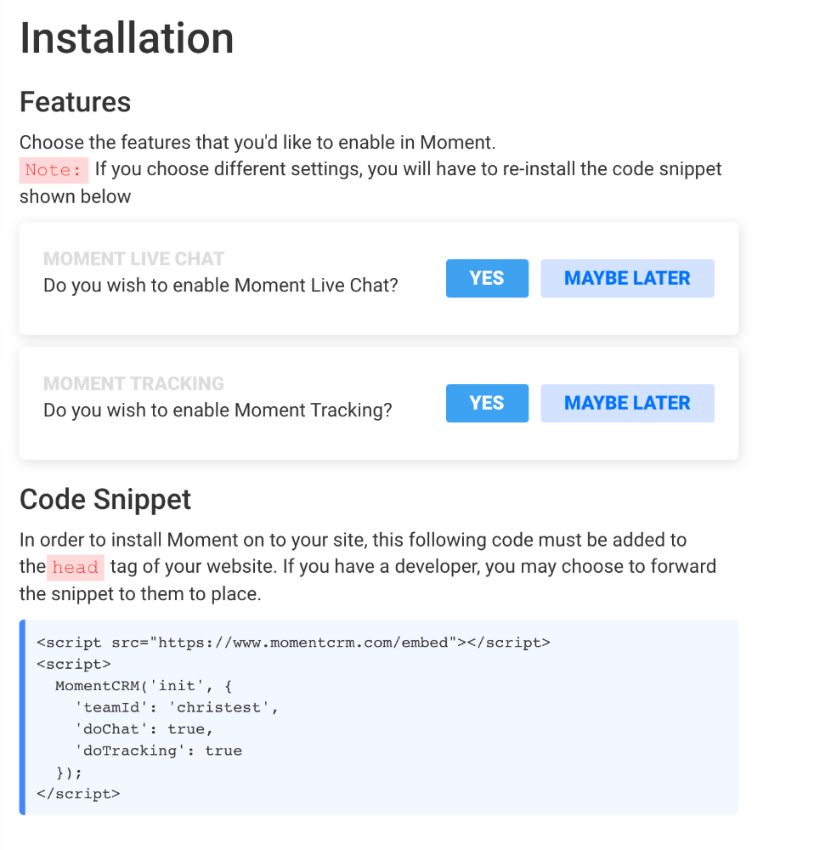
To install you custom code snippet to your webflow website, follow these steps:
- Head to Project Settings
- Click on the Custom Code tab
- In the “Head Code” section, paste the Moment code snippet
- Click on the “Save Changes” button
- Lastly, click on "Publish"
The Moment chat bubble will now appear across your site and your customers will be able to contact you via live chat right away.
Customizing your Live Chat
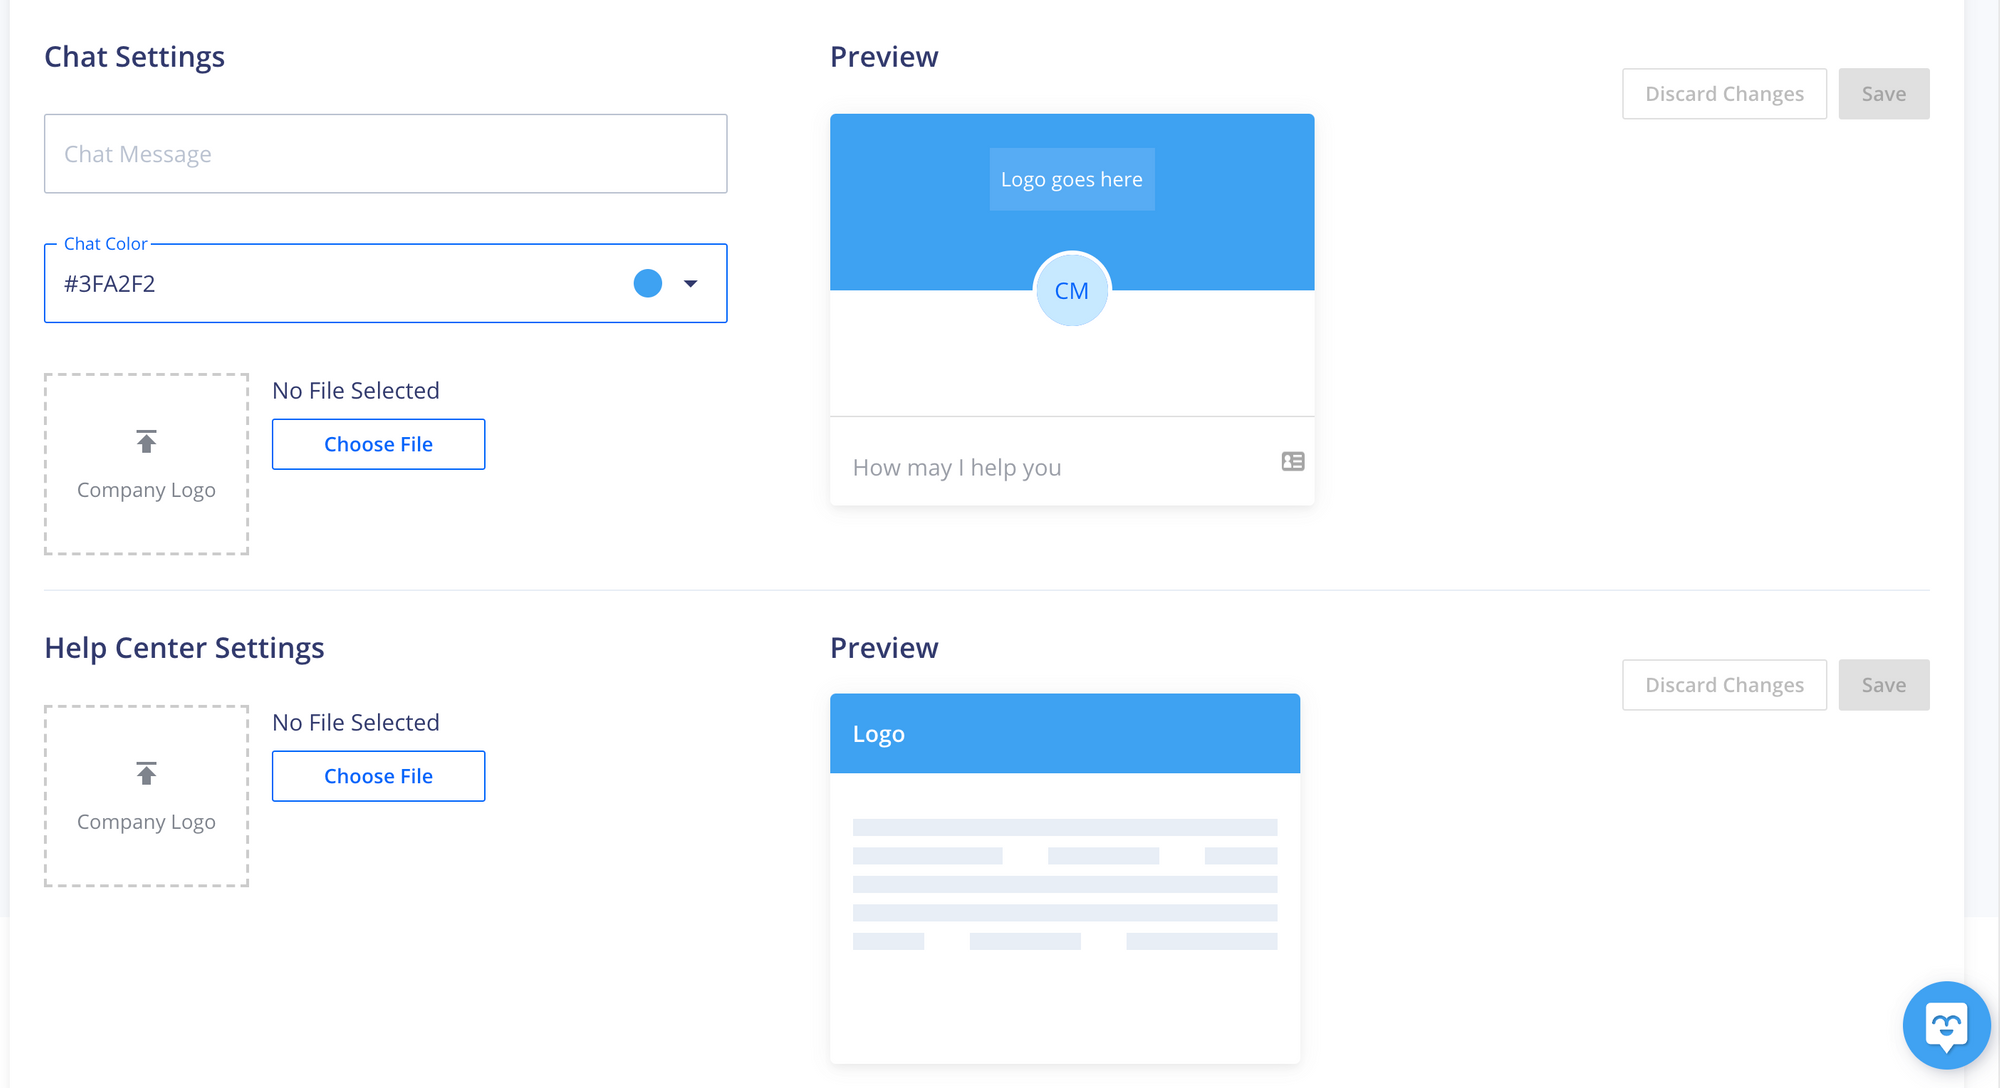
The great thing about our free live chat is we give you the ability to customize it to match your company and brand.
In the drop down-menu on the left top corner, Under General, click on Team Settings
You'll be taken to the General Settings Tab. On this page, you'll be able to change your team name, chat message, color and insert your company logo!
Adding Team Members to your live chat
With our free account, you can add another team member (2 in total). If you need to add another employee, you can do so.
In the Moment dashboard, click on the menu in the top-left of the screen and under General click on Team Settings, then on "Members"
Then click on "Add Member" on the top left corner

Why you should add a live chat to your site
In case you’re still on the fence about adding a live chat to your site, let’s review some of their pros before we get started.
There are multiple benefits to adding a live chat to your website that go beyond just communicating with your visitors.
Live chats can:
- Become a lead generation tool by sourcing customer data
- Increase your revenue and sales by providing timely customer support
- Increase the efficiency of your support team by reducing the number of incoming emails and calls
- Reduce your overall support costs
Learn more about the benefits of live chat by reading our guide on why you should add a live chat to your website.
Getting Started with Live Chat
And that’s all that there’s is to it. You can now use a live chat for free on your Webflow website.
But there’s more to live chat support than just getting it up on your site.
Make sure to read our in-depth guide on how to use a live chat to provide customer support.
Happy Chatting!
